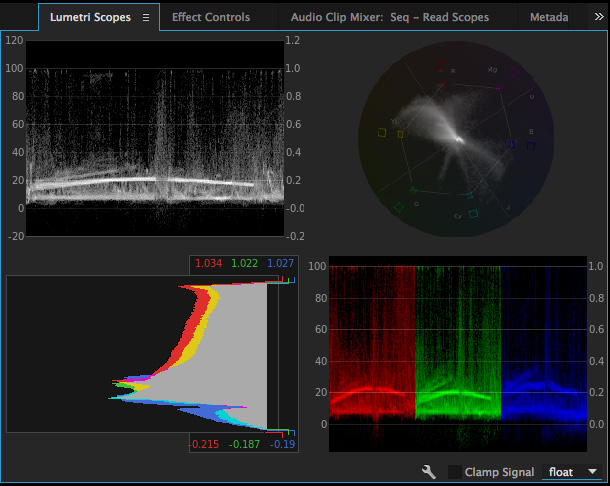
There are five scopes to choose from in premier pro, which you can access by clicking the Wrench icon in the lower right corner of the scopes panel:
- Vectorscope HLS (Hue, Light, Saturation)
- Vectorscope YUV
- Histogram
- Parade (RGB or YUV)
- Waveform Monitor or Luma Waveform

Vectorscope
The Vectorscope displays the video’s chrominance information in a a circular chart. Saturation is measured from the center of the chart outward.
Vectorscopes work in YUV and HLS (Hue, Lightness, Saturation) modes. The YUV Vectorscope uses the more familiar YUV color space including color targets to display the pixel distribution in your images more intuitively. The YUV vectorscope is the default option.
Histogram
Histogram shows RGB values. The minimum Luma values per channel are displayed as numerical feedback at the bottom. Maximum values are displayed at the top. Two horizontal lines indicate the output range. Similar to the Histogram in Photoshop, it shows the distribution of pixels in an image from pure black at the bottom to pure white at the top.
RGB Parade
RGB Parade scope displays separate waveforms for the red, green, and blue components of an image. The waveforms are displayed side by side, making it easy to compare the relative levels of reds, greens, and blues in an image, and make adjustments as required. The RGB Parade scope also makes it easy to spot color casts in your image.
Waveform Monitor or Luma Waveform
It displays the gray-scale values in the image under the playhead, where high luma levels appear as spikes on the waveform, and low luma levels appear as dips. This scope lets you quickly identify highlights and shadows in your image, helping you achieve precise black-and-white balancing. (Something like exposure)
*Clamp Signal : To lock the lumetri scope at 100%*
Another excellent post – thank you very much, Sylvester!
ReplyDeleteP.S. It is good to see that you have demonstrated evidence of extra research!
Delete